ℹ️ The image in this post was only available as a small thumbnail (the original could not be found anywhere), so it was upscaled in high quality (bicubic for screenshots with text, the Real-ESRGAN AI algorithm for photos). Its sharpness of detail may not exactly match the original.
I will describe the procedure for Windows 8, building the files of this jQuery plugin: https://github.com/dimsemenov/photoswipe.
- Download the Node.js installer for your version of Windows from https://nodejs.org/download/ and install all components. One of the components is the
npmpackage manager, and another one adds the path to Node.js to the systemPATHvariable and the path tonpmto the userPATHvariable. - Now we specify the repository we want to clone, most likely from GitHub. You need to do this in Git Shell, which is installed together with Git For Windows.
BASH
git clone https://github.com/dimsemenov/PhotoSwipe.git - Now open the Command Line: press
win+r, typecmdand hit Enter. First, install 4 packages of Node.js. I am not sure whether all 4 are needed, but it worked for me with them and I did not investigate any further. This installs the packages the build cannot do without.BASHnpm install -g grunt-cli npm install -g grunt npm install -g grunt npm install -g jekyll-cli - Go to the directory with the cloned repository and run the installation of the packages that only this repository depends on; they are not stored globally, but in the repository’s
node_modulesfolder. In this case it will take a bit longer, because there really are a lot of dependencies.BASHcd PhotoSwipe npm install - Now we need Ruby for Windows and its package manager
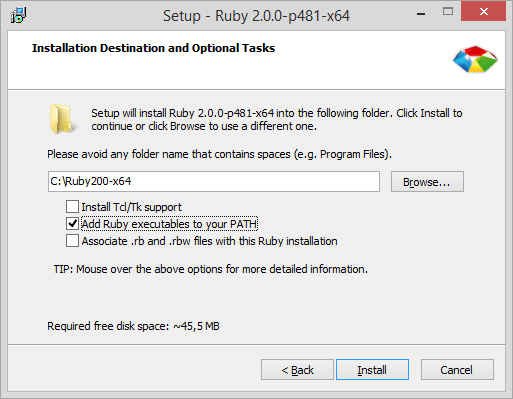
gem. You can continue with my guide, or with the very detailed 👻 RIP – this server did not even survive its own hosting. that mine is based on. Download Ruby from http://rubyinstaller.org/downloads/ ; at the very top left you should find the latest version of the .exe installer, just watch out for the bitness of your Windows. Again, select everything the installer offers:
- Download RubyDevKit from the same page; towards the bottom left there is a DEVELOPMENT KIT section where you will find versions for both
x86andx64systems. It is a self-extracting archive, but be careful: if you want its contents in theC:\RubyDevKitfolder, you have to create this folder and select the full path to it. If you select justC:, the files will be extracted to the root of the drive and make a mess. - Go to the folder you created, gather information about the Ruby installation and add RubyDevKit to it.
BASH
cd C:\RubyDevKit ruby dk.rb init ruby dk.rb install - We are approaching the finish line. Install Jekyll, which is a static site generator supporting various syntaxes. Without this program you would not be able to run the build, because it would always throw an error.
BASH
gem install jekyll - Finally, go back to the folder where you cloned the repository (in my case “
C:\Users\Radeksunamo\PhotoSwipe“) and run the build using Grunt:BASHgrunt
And that is all. In the repository folder you will find a _site folder, which contains various files that might come in handy. However, in most cases you will probably only need the folder _site/dist, which contains the JS, CSS, fonts, etc.